

Terrain Slicer
The slicer needs a wide screen to be usable — the parameter column and the sheet preview sit side by side. Open this page on a desktop or laptop, or download the desktop application further down.
Open anywayThe whole application runs inside your browser — the terrain you load never leaves your computer, and nothing is uploaded to a server. The first start takes a few seconds while the Python runtime is fetched and cached; after that it is instant.
Getting started: click load demo terrain. The scale is set so the model fits a sheet; from there, change the material thickness or the number of boards and the sheets redraw as you type.
Terrain Slicer turns a digital terrain model into laser-ready DXF files for a stacked cardboard contour model — in the browser, or as a desktop application.
Open source (GPLv3) · no GDAL, no paid software · everything runs on your own machine
Building a physical terrain model by hand means tracing every contour, cutting every layer, and hoping the stack lines up. This tool does the geometry: you load an elevation raster, set the scale and the material thickness, and it returns the sheets to cut and a report telling you what to glue where.
The method
The output follows the horizontal contour model (offset method) — the workflow documented on this site and previously built in Grasshopper. The idea is that a contour model does not need solid slabs at all.
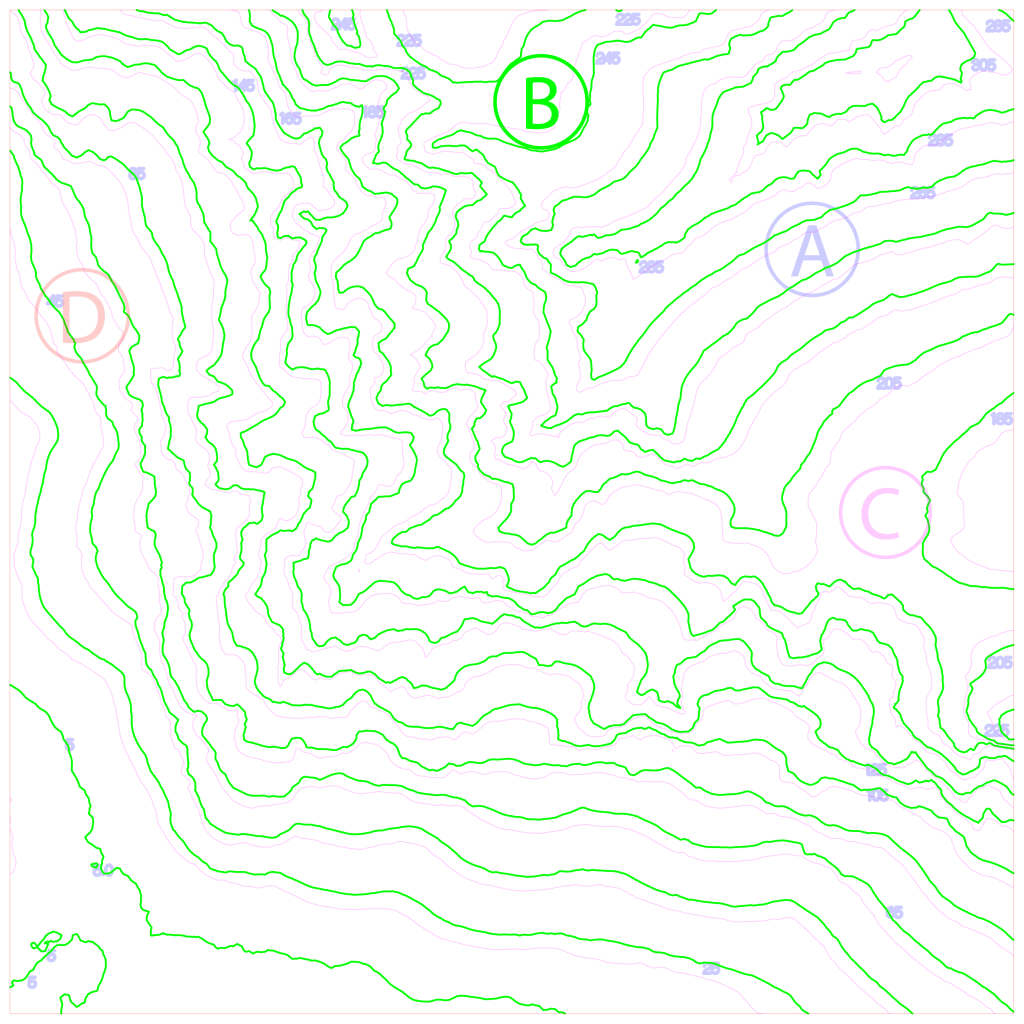
Contours from the raster
The contour interval follows from the material: board thickness × scale, adjusted for any vertical exaggeration. Slice from the lowest point or from 0 m altitude.
Distributed over N boards
Every board is the full footprint of the model and is cut in place. Board k carries contour levels k, k+N, k+2N and so on.
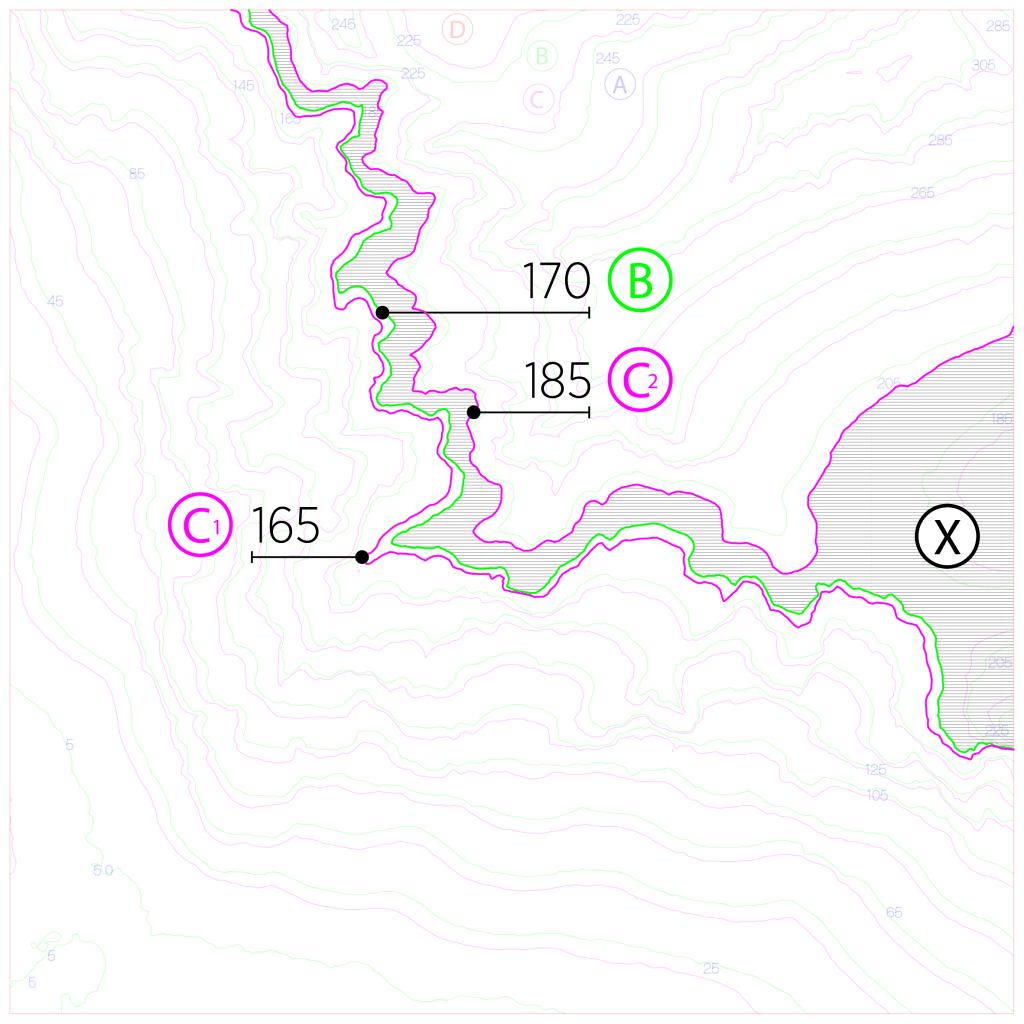
Each contour cut exactly once
One cutline serves two purposes: it is the back edge of one ring and the outer edge of the ring above it. The pieces come off as rings rather than slabs, which is where the material saving comes from.
Glue references scored, not cut
A lighter score marks where the next ring lands, so the stack self-registers during assembly. The app reports the narrowest glue strip in the model so you can pick the lowest workable number of boards.
Numbered where the number disappears
Layer numbers are engraved into the glue zone, so they are readable while you assemble and hidden once the next ring is on top.


What comes out
One DXF per material sheet, plus a cutting report listing the parameters, which board sits on which sheet, the contour elevations and the narrowest glue strip. The layers are named and coloured for a laser cutter’s pass list — run them top to bottom, cutting last:
| Pass | Layer | Does |
|---|---|---|
| 1 | DLF-01_score_light | Contour numbers and blue feature lines |
| 2 | DLF-02_score_medium | Glue references and green feature lines |
| 3 | DLF-03_score_strong | Cyan feature lines |
| 4 | DLF-04_cut_inner | Contour cutlines |
| 5 | DLF-05_cut_outer | Board outline — always last |
Input: GeoTIFF elevation rasters and OBJ meshes, plus optional shapefiles for hatched areas, line features and point features.
Download the desktop version
The desktop build is the same application without the browser: it handles larger terrains and bigger files, starts instantly, and needs no Python installation.
Windows, macOSLatest release
Pick the file for your system on the release page: windows‑x64 for Windows, macos‑arm64 for Macs with Apple silicon, macos‑x64 for Intel Macs — not the “Source code” archives GitHub lists alongside them. Unpack and run; no installation. The macOS builds are produced and tested automatically but not yet hand‑checked on a physical Mac.
Download — GitHub Source & licence →Disclaimer
Terrain Slicer is provided as is, without warranty of any kind — see the GPLv3 licence for the full warranty and liability terms.
Verify before you cut. Always check dimensions, scale, contour interval and sheet layout in the exported DXF files and the cutting report before sending anything to a laser cutter. A wrong parameter can waste a full run of material.
Laser safety is the operator’s responsibility. Operating a laser cutter, choosing safe materials (no PVC or other chlorinated plastics), fume extraction and fire watch are entirely the responsibility of the machine operator and their workshop rules. This software only produces drawings.
Terrain data. You are responsible for having the right to use the elevation data and shapefiles you load. All processing happens locally on your machine, or in your browser in the web version; the software collects and transmits no personal data.
Built on open source, with thanks to the people who maintain it: Python, NumPy, Shapely, ContourPy, tifffile, ezdxf, FastAPI, Pyodide, three.js, the Hershey stroke fonts, and the Source Sans 3 and Quattrocento Sans typefaces. Developed by Digital Landscapes with AI assistance.